- Mobile Apps
- Spryple HCM
Spryple integrated HCM/Lite User Manual
1. Introduction
1.1 Overview
- Welcome to the Spryple HCM App, a powerful tool designed to streamline attendance tracking, leave tracking and Rewards & Recognitions
1.2 Purpose of the App
- The app serves as a modern and secure solution for employee attendance management, leave management providing accurate and real-time tracking
1.3 System Requirements
- Ensure your device meets the minimum specifications outlined in the system requirements section to guarantee optimal performance
2. Getting Started
2.1 Installation
- Open the Play store and search for ‘Spryple HCM’. Click on ‘Install’ to install it. It is often integrated into the web application
2.1 Account Creation
- Create user accounts for the Manager and the Receptionist, ensuring secure access to the attendance system
- The Account Creation is done from the integrated web application. Once the accounts are created, the app is ready to use
2.3 Usage of App
- Open the App and give the necessary credentials based on the role (Manager or Employee) and ensure the device has the internet connection (Mobile data or Wi-Fi)
- The Account Creation is done from the integrated web application. Once the accounts are created, the app is ready to use

3. User Interface
3.1 Main Screen
- Navigate through the user-friendly main screen to access key features and functionalities.

Manager & Employee Logins:
- Dashboard is displayed with screens as Rewards & Recognition, Attendance Management, Leave Management & Payroll Management
- The Manager has the features to Approve Attendance Requests & Leave Requests, Send & Receive messages through Rewards and Recognition
- The Employee has the features to Apply Attendance & Leave Requests, Send & Receive messages through Rewards & Recognition
ATTENDANCE MANAGEMENT:
Applying Attendance Request by Employee:
- Employee applies for an attendance request in the below screens
Step 1: Login to SprypleHCM with Employee credentials by entering Company Code, Username & Password
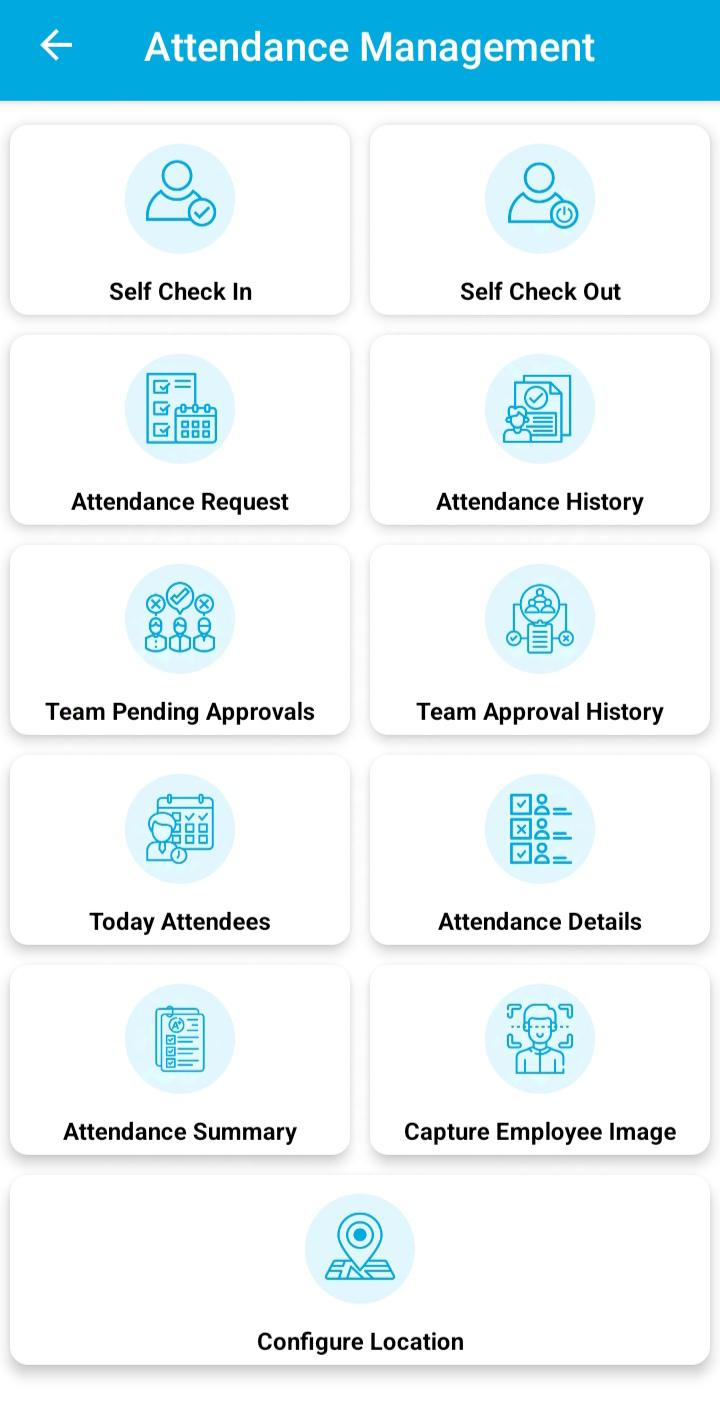
Step 2: Click on Attendance Management in the dashboard and then on Attendance Request

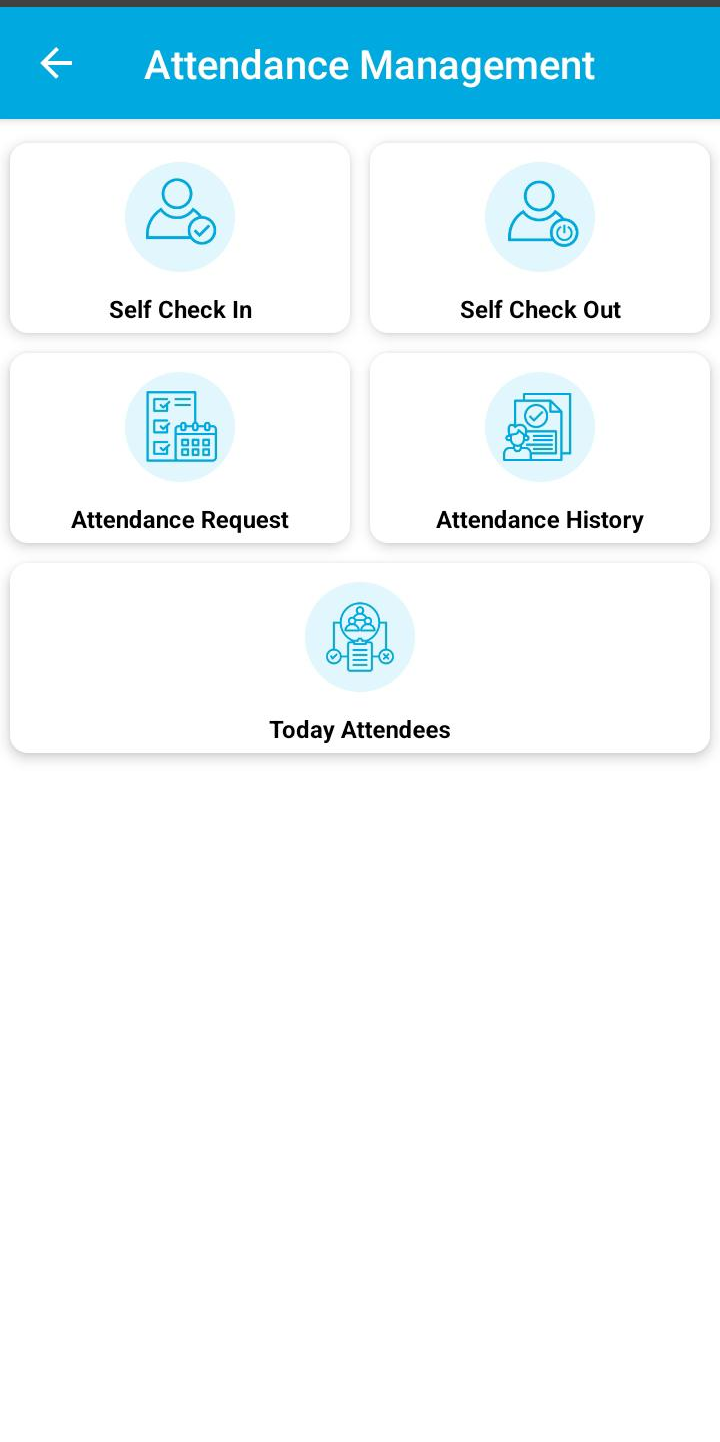
Step 3: User can be able to self-check in/self-checkout his/her face configuration and user can be able to see check-in/checkout timings in web application dashboard.
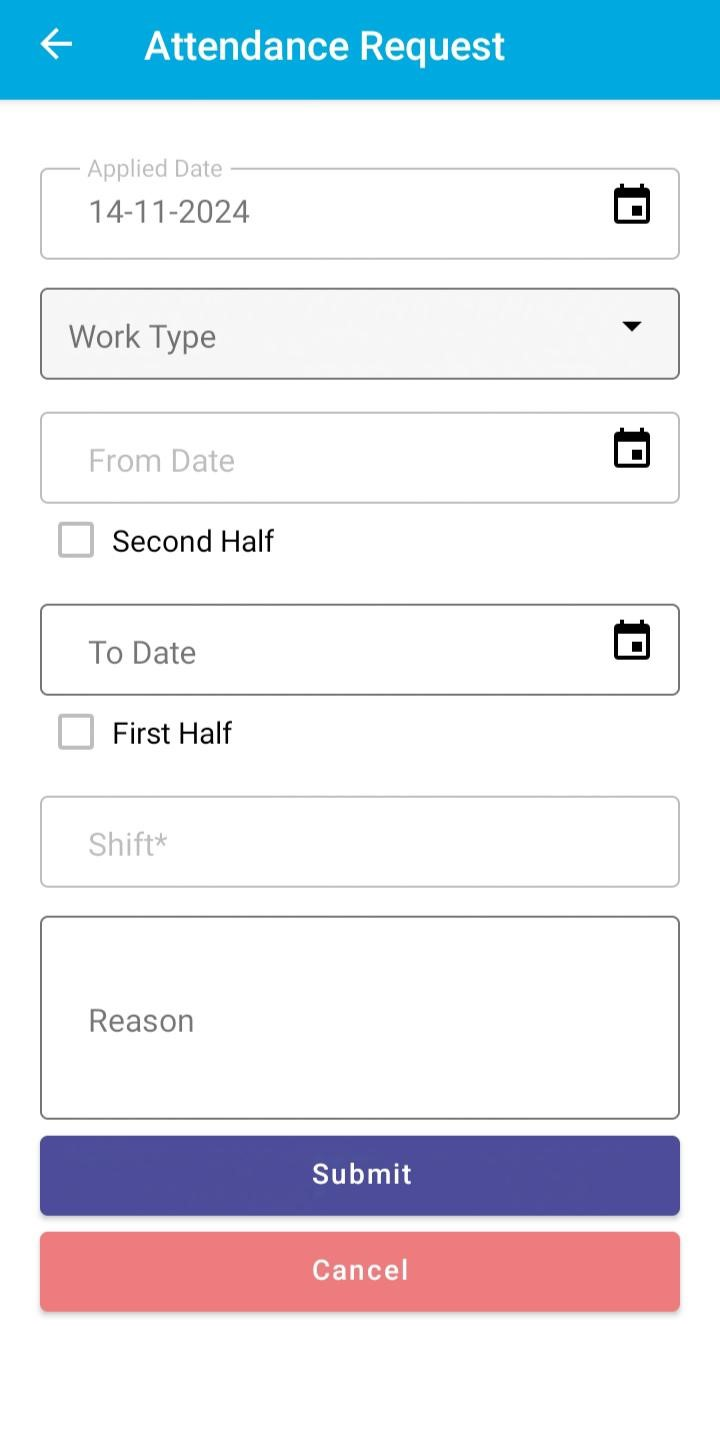

Step 4: In the Attendance Request page, select Work Type drop down, From Date, To Date, enter reason and click on Submit button. “Attendance Request Applied Successfully” confirmation message is displayed.
How to check Attendance History?
In Attendance History, user can see all the submitted, approved, rejected attendance requests details
Approving Attendance Request by Manager:
Manager approves the applied attendance requests of employees
Step 1: Login with Manager credentials by entering Company Code, Username & Password
Step 2: Click on Attendance Management in the dashboard and then on Pending Approvals


Step 3: On click Pending Approvals, submitted attendance requests of employees are displayed

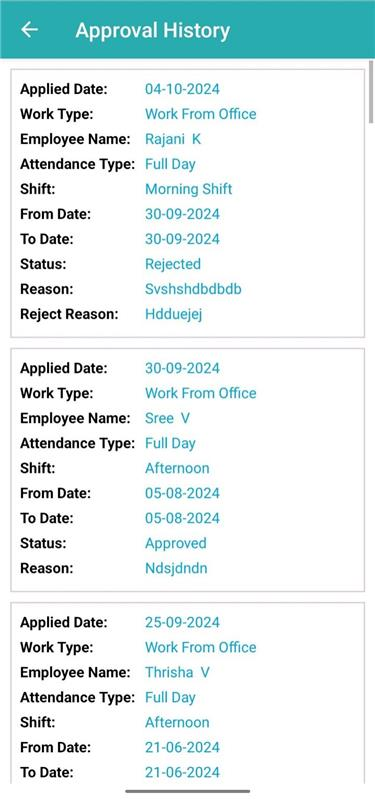
Step 4: On click the Submitted button, Approve button to approve requests or Reject button to reject the attendance requests are displayed. After clicking on Approve, a confirmation message “Attendance Request Approved Successfully” and status is changed to Approved in employee’s login. On Reject “Attendance Request Rejected Successfully” is displayed and status is changed to Rejected in Employee’s login.
Reports:
Today Attendees:
- Manager can check multiple check ins and Check outs of all the employees for the current day.

Attendance Details:
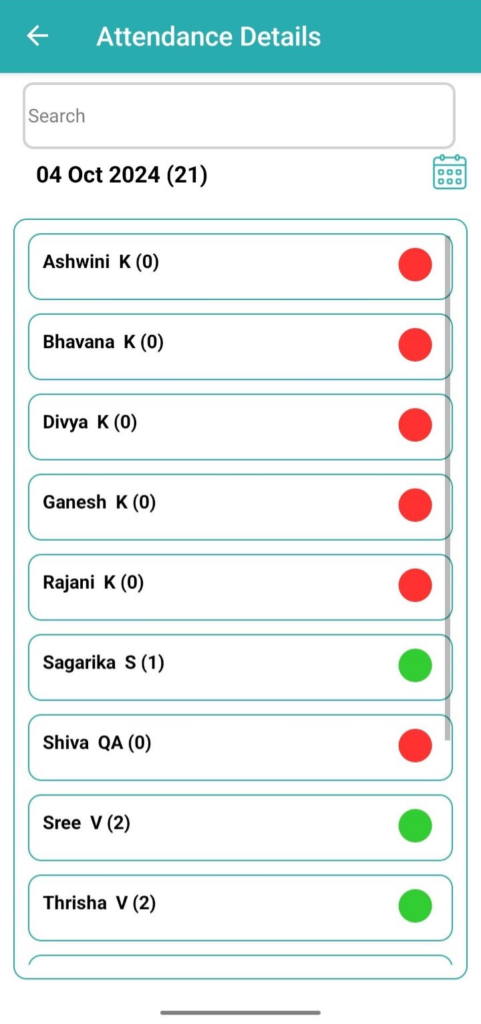
- In Attendance Details, check ins and check outs data will be displayed of all the Employees along with the date wise
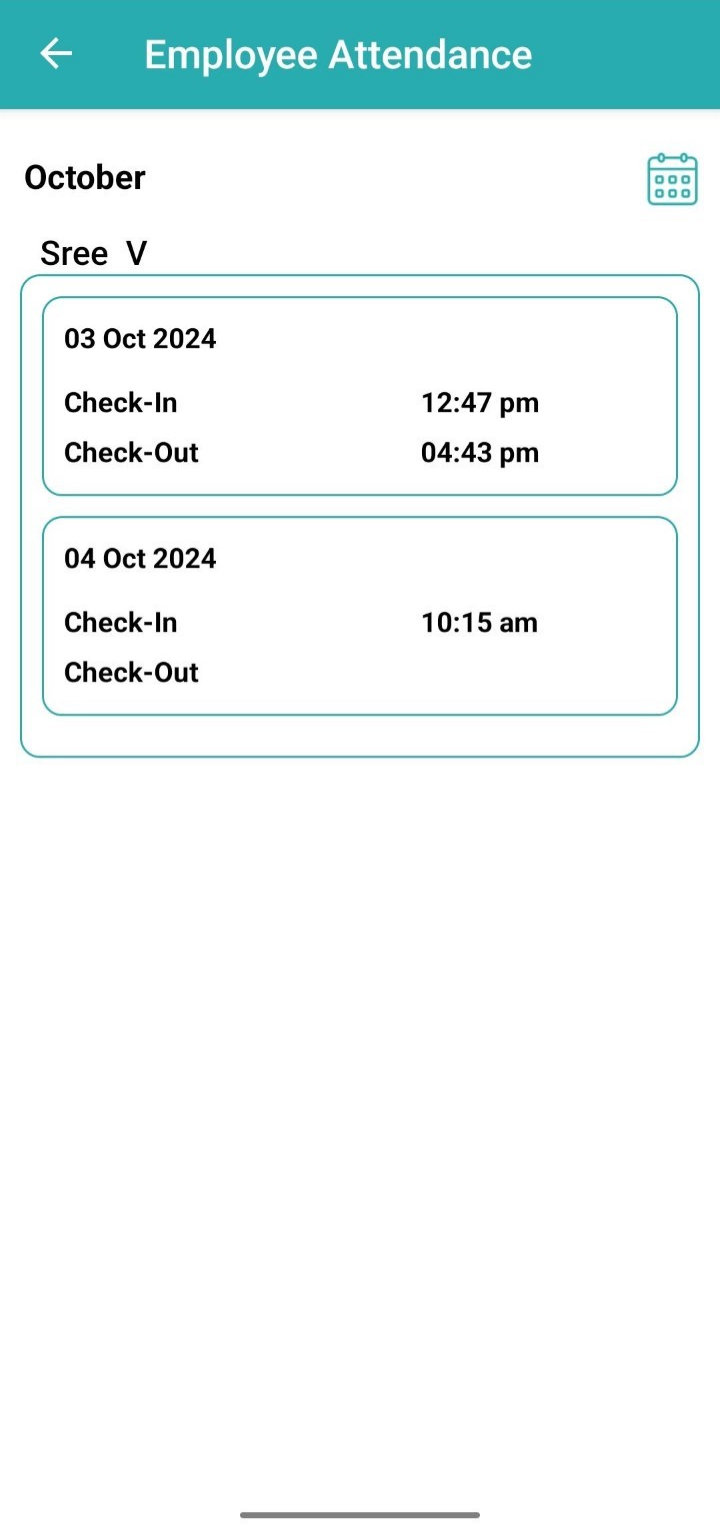
Attendance Summary:
- Select "Attendance Summary" from the available options
- The default view displays a summary of the current month till date
- In the Attendance Reports each Employee ‘Present Count’ will be displayed for that month, User can select desired month from the Calendar icon given


Capture Employee Image:
- In this feature the manager can configure their employees’ facial recognition profiles
- If an employee’s facial recognition is uploaded the status will be ‘Verified’ or else ‘Not Verified’ will be displayed


- On click view icon, manager can see the captured image of an employee
- Manager can also click on Recapture to update the captured image
- Manager can also delete the existing image & can capture image again
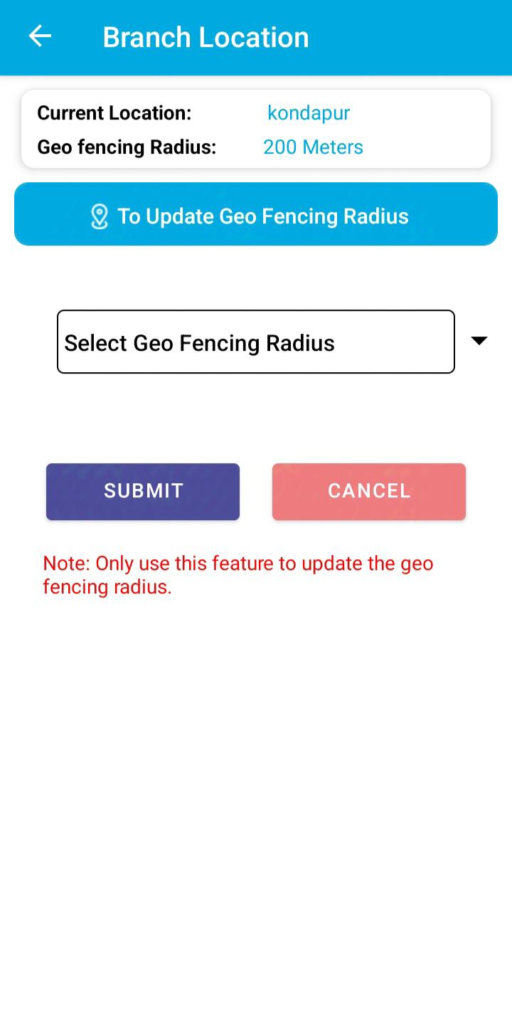
Configure Location:
- In this feature the manager can configure the location
- Employee can check in and check out based on configured geo location

Attendance captured by employees in Receptionist Login:
- Login with valid credentials of the receptionist so that added Employees can Check-in and Check-out in configured geo location by clicking on Front Office Check in or Front Office Check Out.

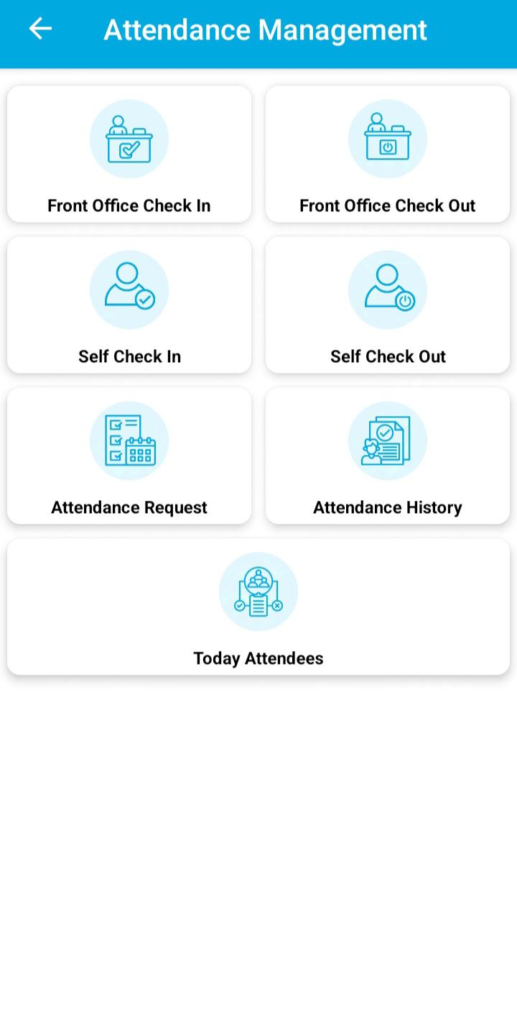
- Click on Front Office check In in the Receptionist login
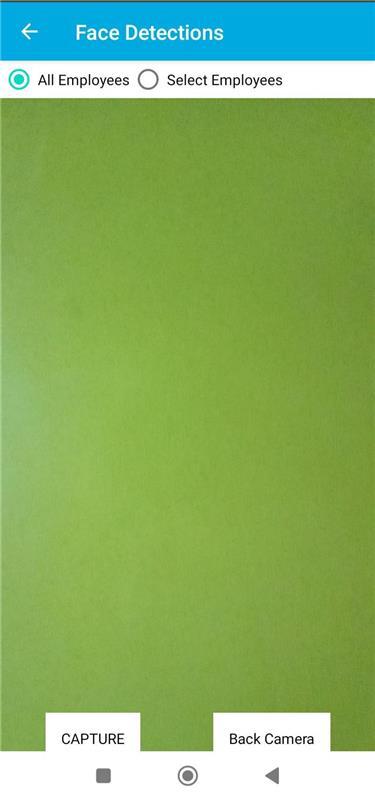
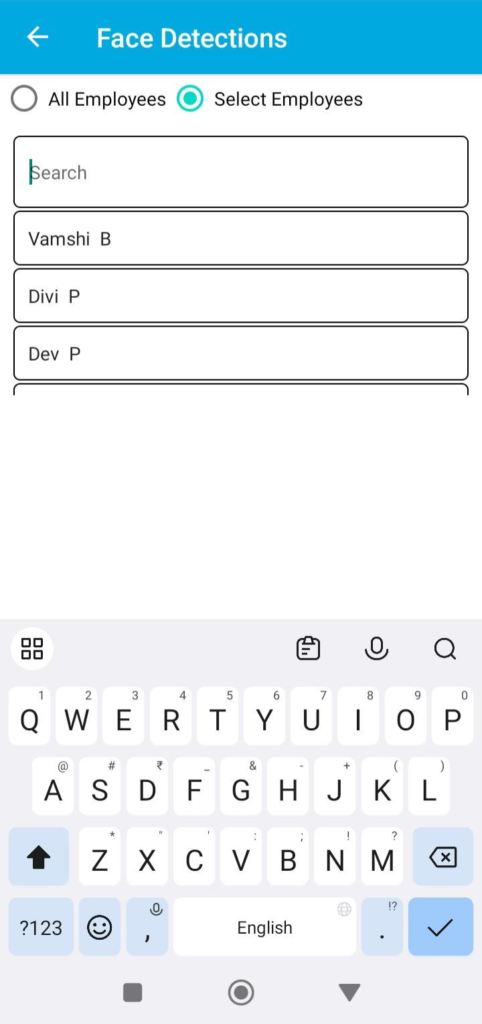
- Click on All employees' radio button and then employees can capture their attendance
- Click on Select employees radio button and then user can search for data and can capture the employee attendance
LEAVE MANAGEMENT:
Applying Leave Request by Employee:
- Employee applies for a leave request in the below screens
Step 1: Login with Employee credentials by entering Company Code, Username & Password
Step 2: Click on Leave Management in the dashboard and then on Leave Request

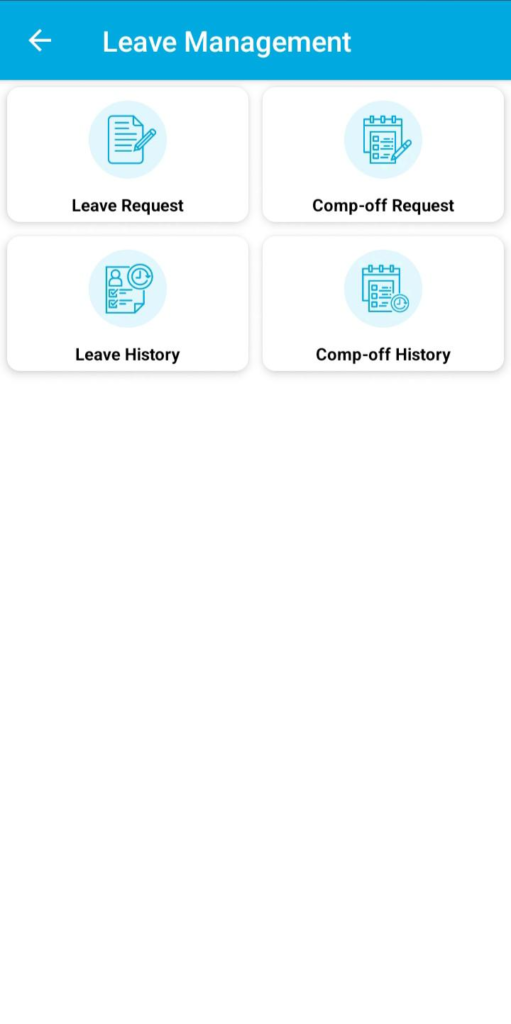
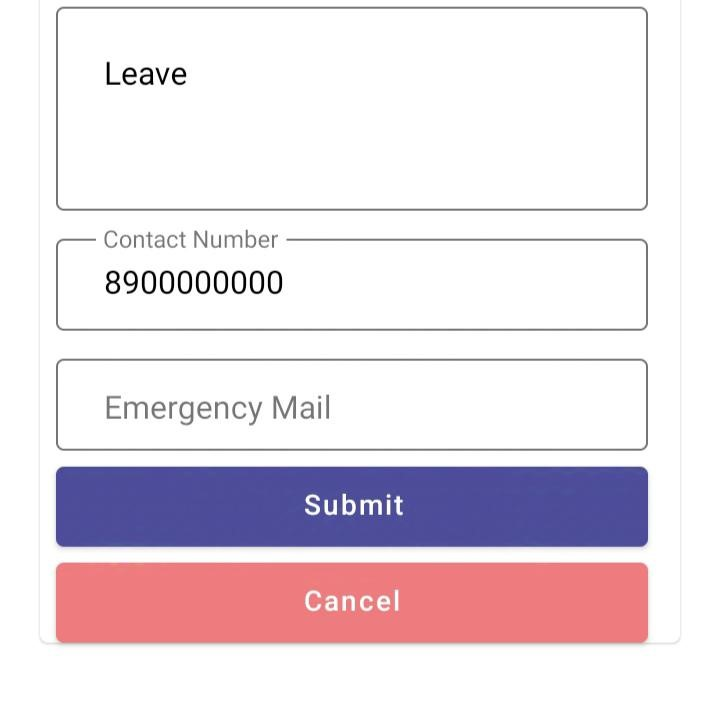
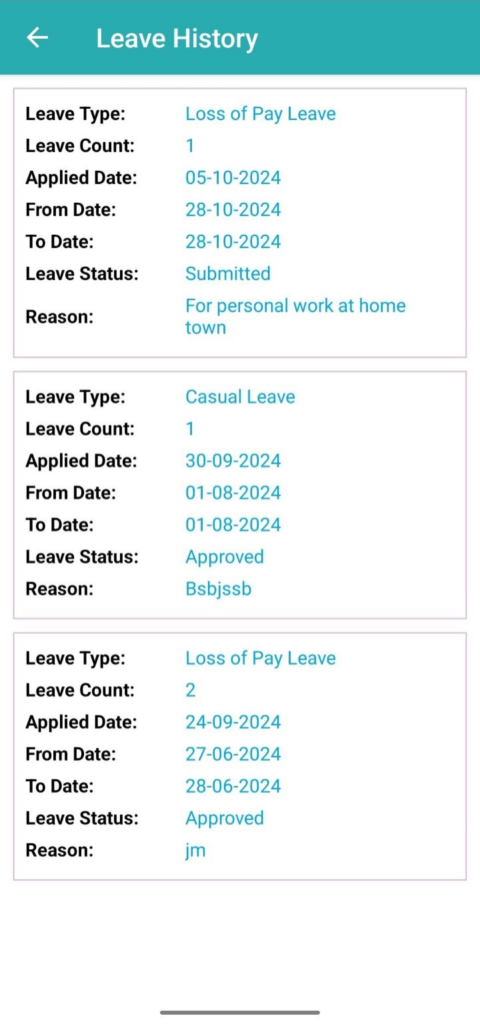
Step 3: In the Leave Request page, select Leave type, From Date, To Date, enter reason and click on submit button. A confirmation message is displayed as “Leave Request Submitted Successfully”. In Leave History, user can see all the types of leaves with submitted, approved, rejected leave requests details

Approving Leave Request by Manager:
- Manager approves the applied leave requests of employees
Step 1: Login with Manager credentials by entering Company Code, Username & Password
Step 2: Click on Leave Management in the dashboard and then on Pending Approvals


Step 3: On click Pending Approvals, submitted leave requests of employees are displayed

Step 4: On click the View button, Approve button to approve requests or Reject button to reject the attendance requests are displayed. After clicking on Approve, a confirmation message “Leave Request Approved Successfully” and status is changed to Approved in employee’s login. On Reject “Leave Request Rejected Successfully” is displayed and status is changed to Rejected in Employee’s login
Applying Comp-Off Request by Employee:
- Employee applies for a comp-off request in the below screens
Step 1: Login with Employee credentials by entering Company Code, Username & Password
Step 2: Click on Leave Management in the dashboard and then on Comp-Off Request


Step 3: In the Comp-Off Request page, select Worked Date, Worked Hours, Minutes, enter reason and click on submit button. A confirmation message is displayed as “Comp-Off Request Submitted Successfully”. In Comp-Off History, user can see all the comp-off requests data with submitted, approved, rejected comp-off requests details


Approving Comp-Off Request by Manager:
- Manager approves the applied comp-off requests of employees
Step 1: Login with Manager credentials by entering Company Code, Username & Password
Step 2: Click on Leave Management in the dashboard and then on Comp-Off Approvals


Step 3: On click Comp-Off Approvals, submitted Comp-Off requests of employees are displayed
Step 4: On click the View button, Approve button to approve requests or Reject button to reject the attendance requests are displayed. After clicking on Approve, a confirmation message “Comp-Off Request Approved Successfully” and status is changed to Approved in employee’s login. On Reject “Comp-Off Request Rejected Successfully” is displayed and status is changed to Rejected in Employee’s login

PAYROLL MANAGEMENT:
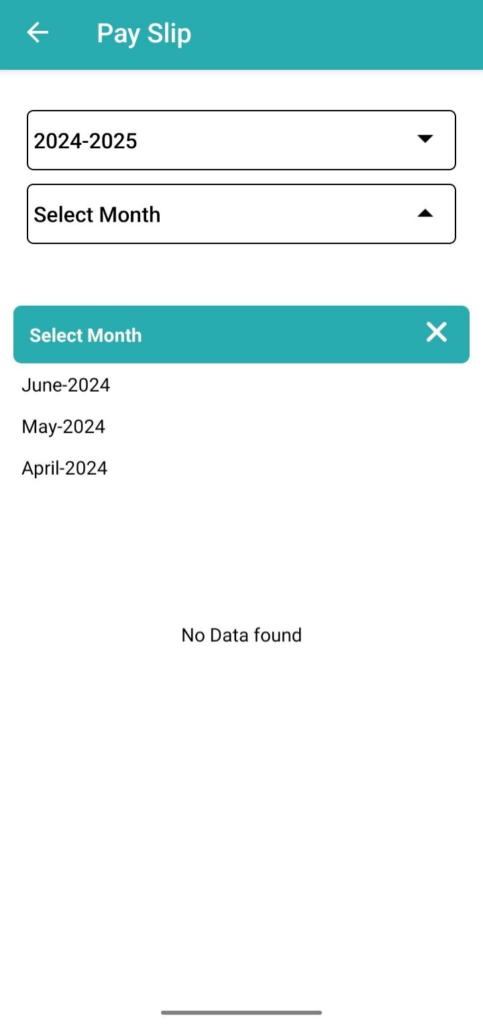
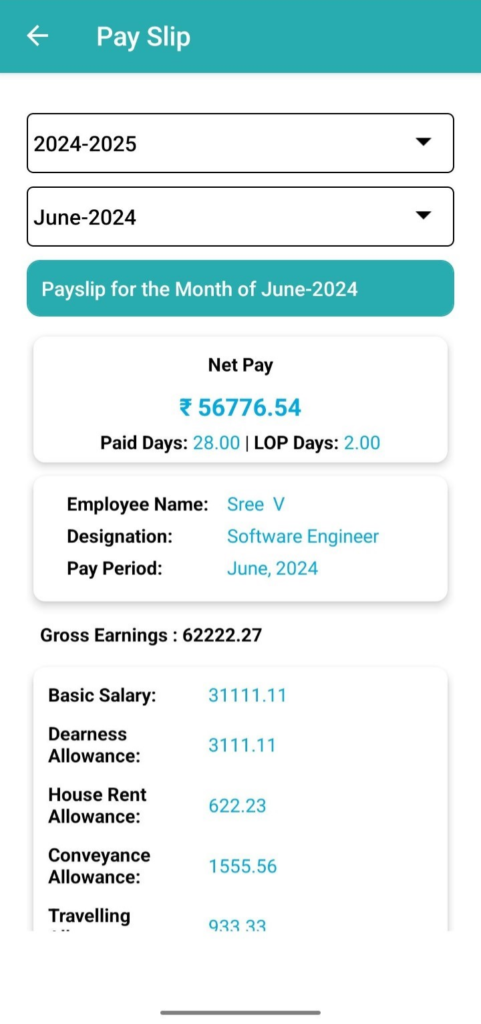
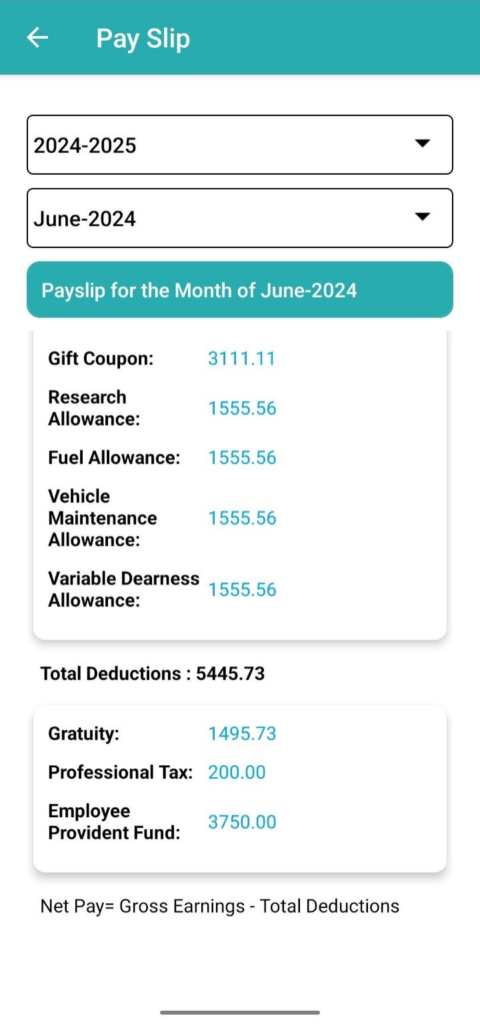
Step 1: On click payroll management, payslips screen is displayed


Step 2: On click the Payslips, employee is able to check payslip by selecting Financial Year from the drop down, Month from the drop down. Employee can check his Net Pay, Total Earnings, Deductions
REWARDS & RECOGNITION:
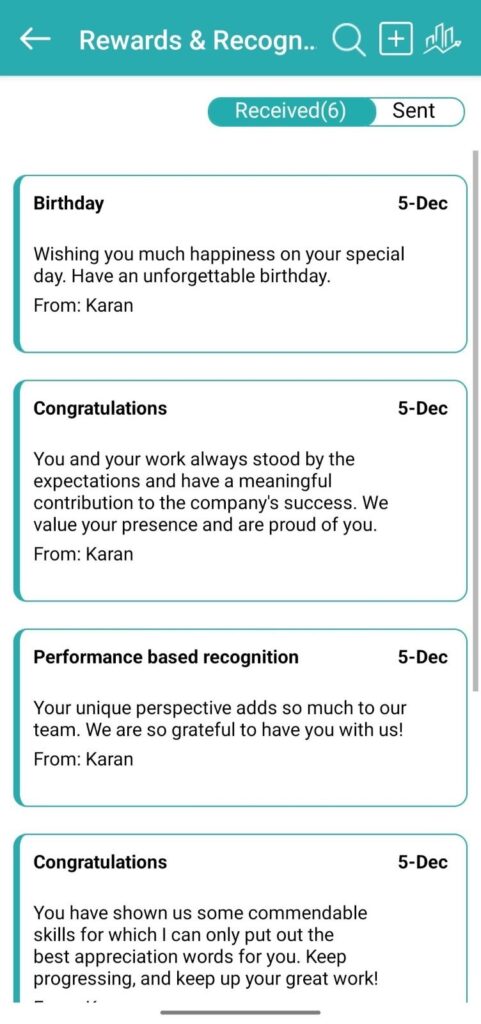
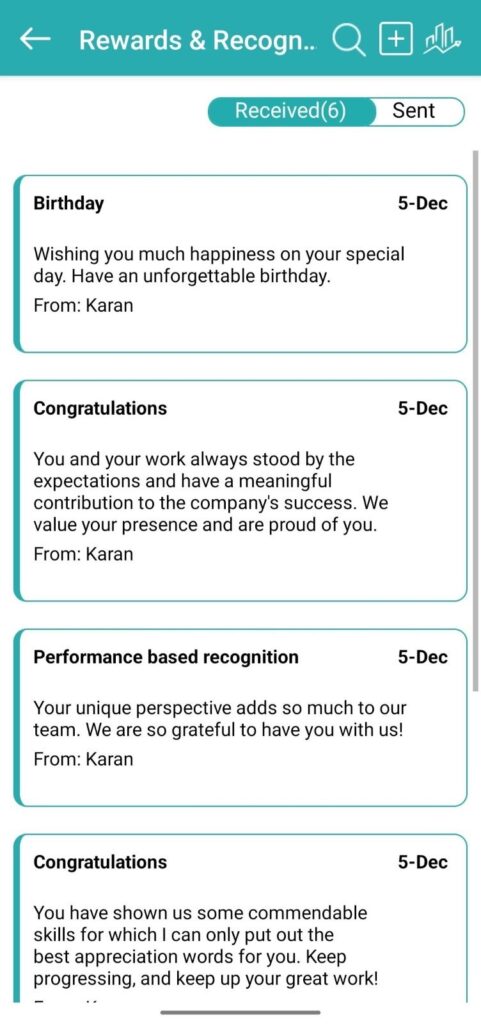
- Users can congratulate their peers to promote a positive and collaborative work culture
- Recognizing and rewarding employees' achievements can boost their motivation levels, leading to increased productivity and performance
Step 1: Login with Employee credentials by entering Company Code, Username & Password
Step 2: Click on Rewards & Recognition in the dashboard and then click on the add button. Select Employee name from the drop down, Recognition Type & Message and can edit the message in the box displayed. After click on the Submit button

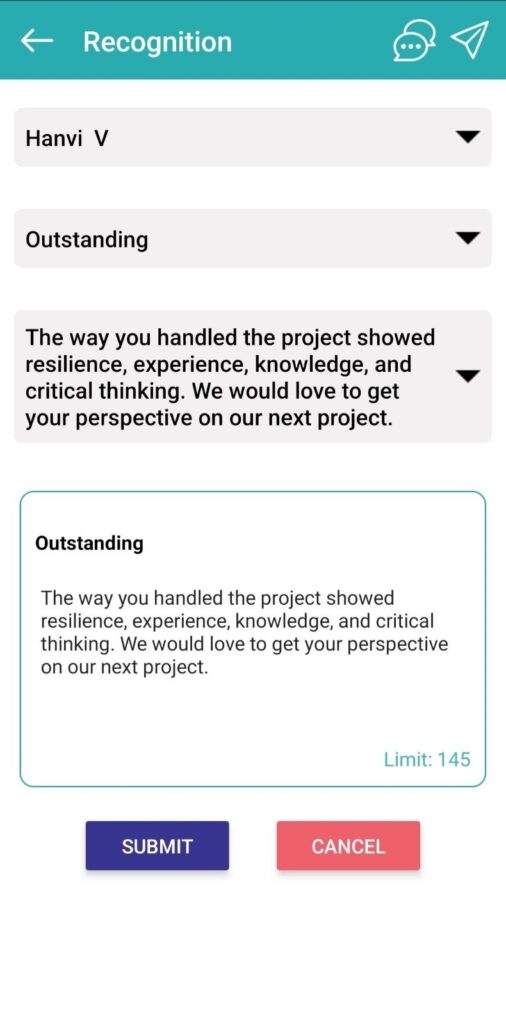
Step 3: After clicking on submit, data is displayed in Sent List. The selected employee in the drop-down list is receiving messages and can see in the Received list

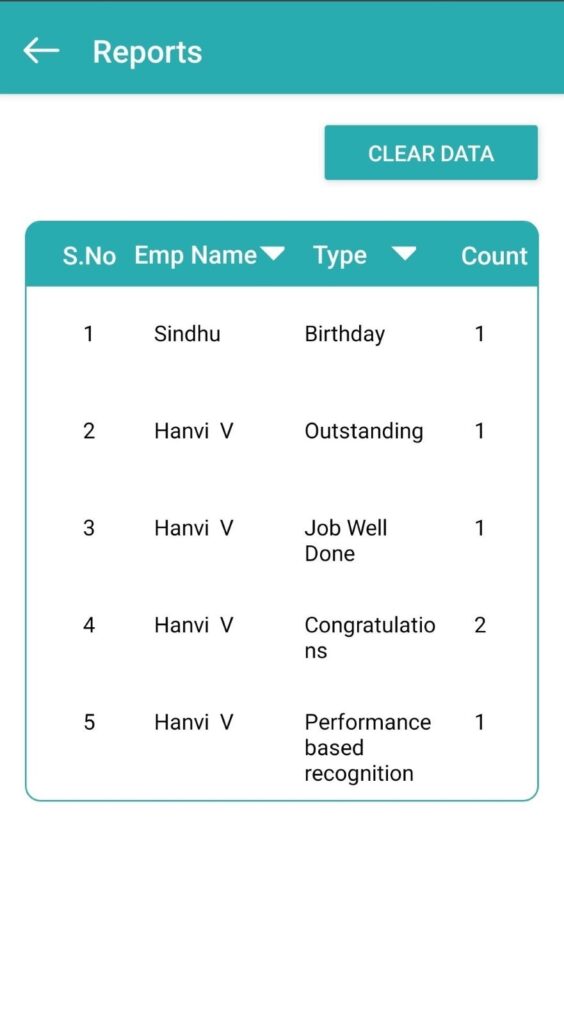
step 4 : Click on Reports button on the top right corner and the reports are displayed with count of Recognition types for each employees
