Welcome to the Claims App, a powerful tool designed for the management of employee reimbursements and claims for various expenses in real-life
1.2 Purpose of the App
The purpose of a Claims application in real life is to streamline the process of managing and reimbursing expenses incurred by individuals—most commonly employees—in a transparent, efficient, and policy-compliant manner
1.3 System Requirements
Ensure your device meets the minimum specifications outlined in the system requirements section to guarantee optimal performance
2. Getting Started
2.1 Installation
Open the Play store and search for ‘Spryple CRM’. Click on ‘Install’ to install it. It is often integrated into the web application
2.1 Account Creation
Create user accounts for the Manager and the Field Executives, ensuring secure access to the attendance system
The Account Creation is done from the integrated web application. Once the accounts are created, the app is ready to use
2.3 Usage of App
Open the App and give the necessary credentials based on the role (Manager or Employee) and ensure the device has the internet connection (Mobile data or Wi-Fi)
The Account Creation is done from the integrated web application. Once the accounts are created, the app is ready to use
3. User Interface
3.1 Main Screen
Navigate through the user-friendly main screen to access key features and functionalities.
Manager & Employee Logins:
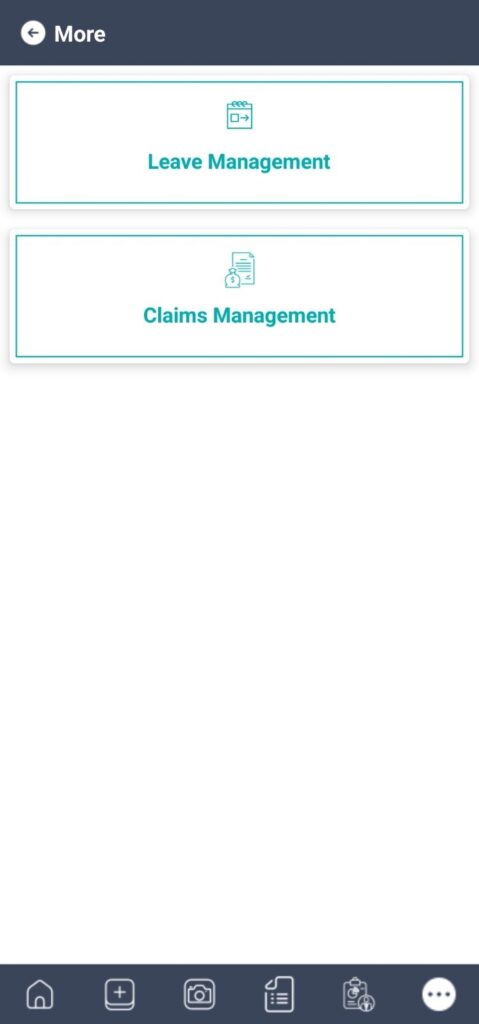
Dashboard is displayed with screens as Leave Management and Claims Management
The Manager has the features to Approve Claim Requests & Leave Requests
The Employee has the features to Apply Claims & Leave Requests
CLAIMS MANAGEMENT:
Claims Management by Employee:
After successfully logging in, click on more option from tabs.
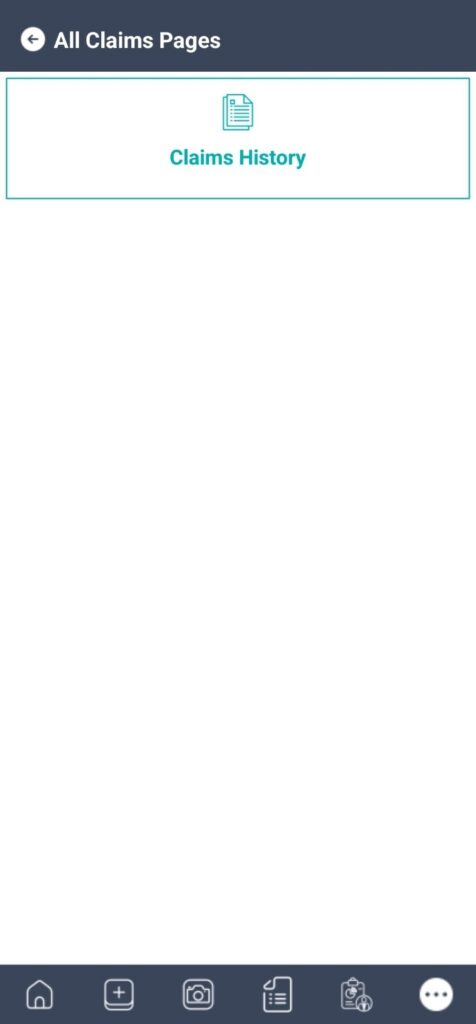
Claim Management module is displayed
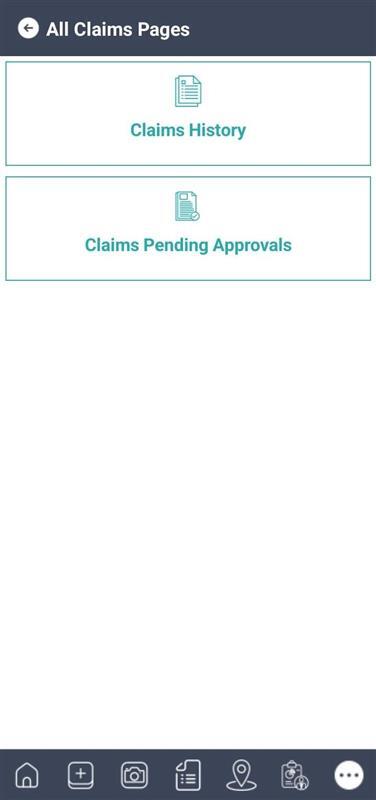
Navigate to Claims Management, “Claims History” is displayed
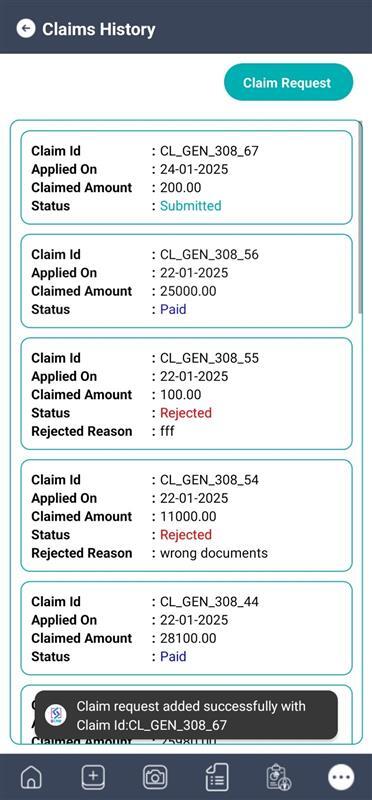
Claims History:
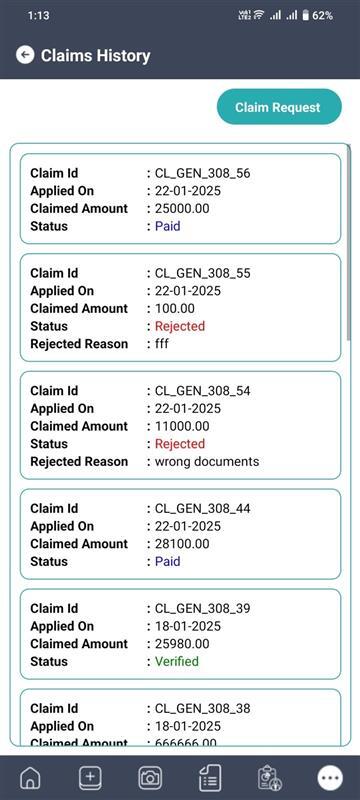
On click “Claims History”, all claims are displayed and “Claim Request” button is displayed
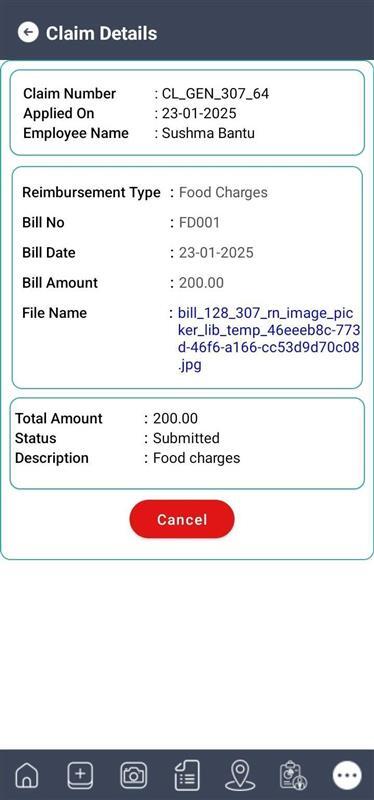
Click on any record in history, claim detail screen is displayed
Status – Submitted, Verified, Paid, Rejected are displayed for all claims
File Name is a Hyperlink to view the uploaded image files
Click on “Cancel”, page is redirected to Claims History
On click “Claim Request” from Claims History page, it is redirected to “Claims Request” page
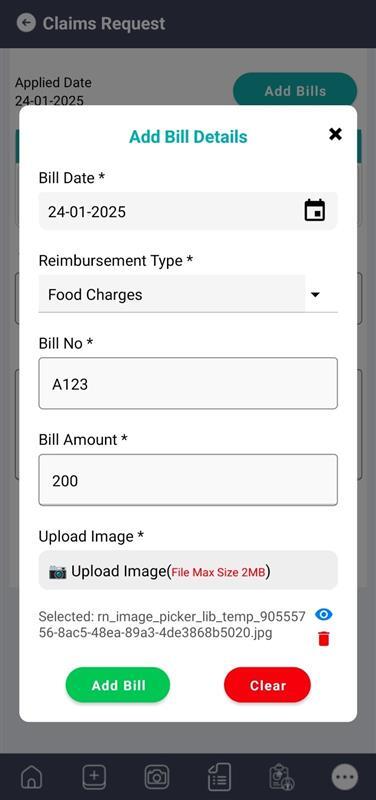
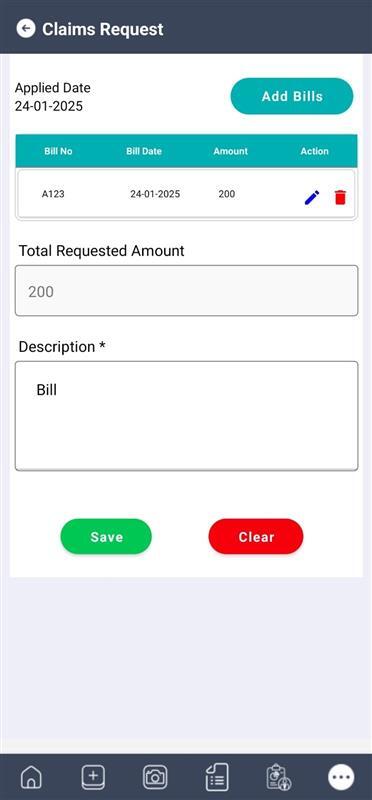
Applied Date is displayed (Current date is displayed here)
“Add Bills” button is displayed, a table is displayed with Bill No., Bill Date, Amount, Action are displayed as columns
All the Claims request bill records submitted are displayed in the table
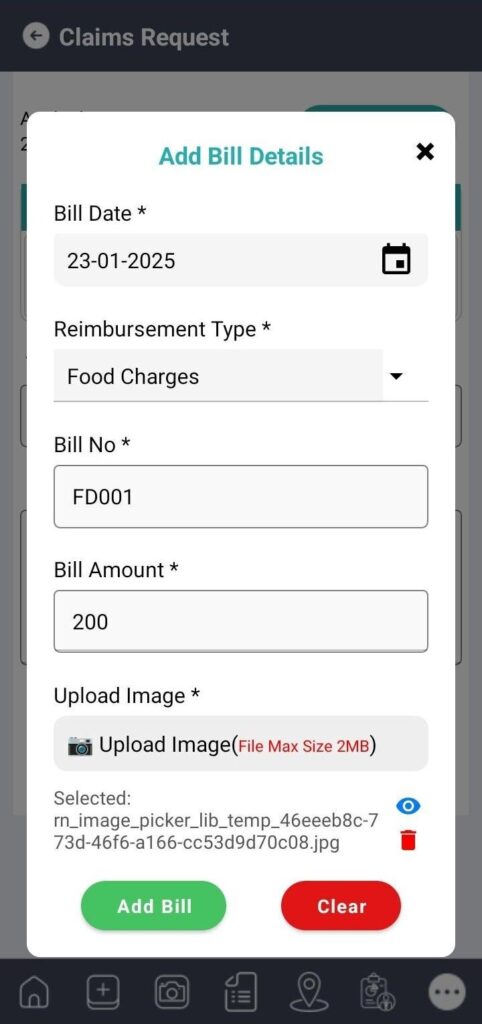
On click “Add Bills”, Add Bill Details popup is displayed
Bill Date, Reimbursement Type, Bill No., Bill Amount, Upload Image and Add Bill, Clear buttons are displayed
Current date is displayed as default in Bill Date field
Select Bill Date, Reimbursement type, enter Bill No. and Bill Amount and upload the image
Click on “Add Bill” button, bill is saved and shown in Bill Details table
Total Requested Amount is displayed with total amount of added bills
Enter Description and click on “Save”, claim request is submitted
The Claim requests submitted are shown under the Claims History page
Claims Management - Manager:
After successfully logging in, click on more option from tabs
Claim Management module is displayed
Navigate to Claims Management, “Claims History” and “Claims Pending Approvals” are displayed
Claims History:
On click “Claims History”, all claims are displayed and “Claim Request” button is displayed
Click on any record in history, claim detail screen is displayed
Status – Submitted, Verified, Paid, Rejected are displayed for all claims
File Name is a Hyperlink to view the uploaded image files
Click on “Cancel”, page is redirected to Claims History
Manager can also raise claim request from “Claim Request” in Claim History page
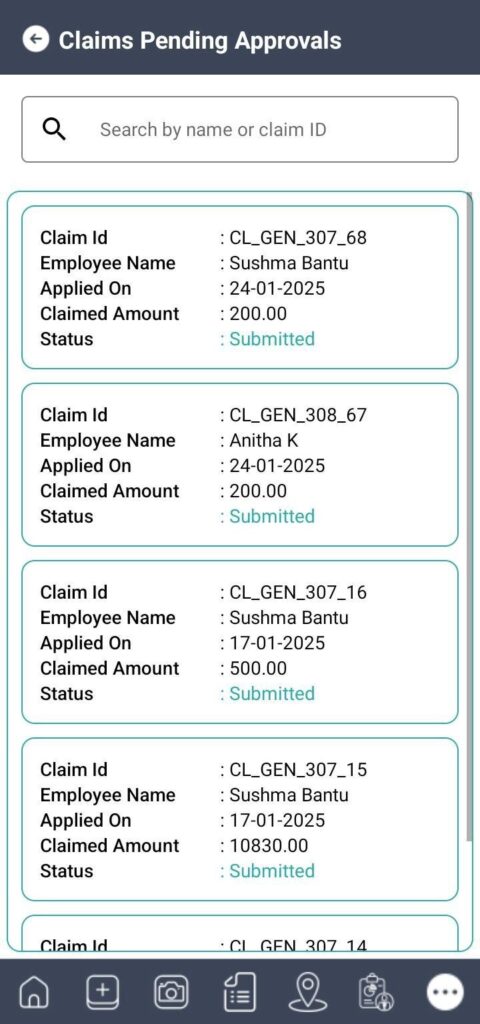
Claim Pending Approvals:
Navigate to “Claims Pending Approvals” from the menu under “Claims Management”, a search field is displayed to search with name or claim ID
All the submitted claim requests are displayed in Claims Pending Approvals
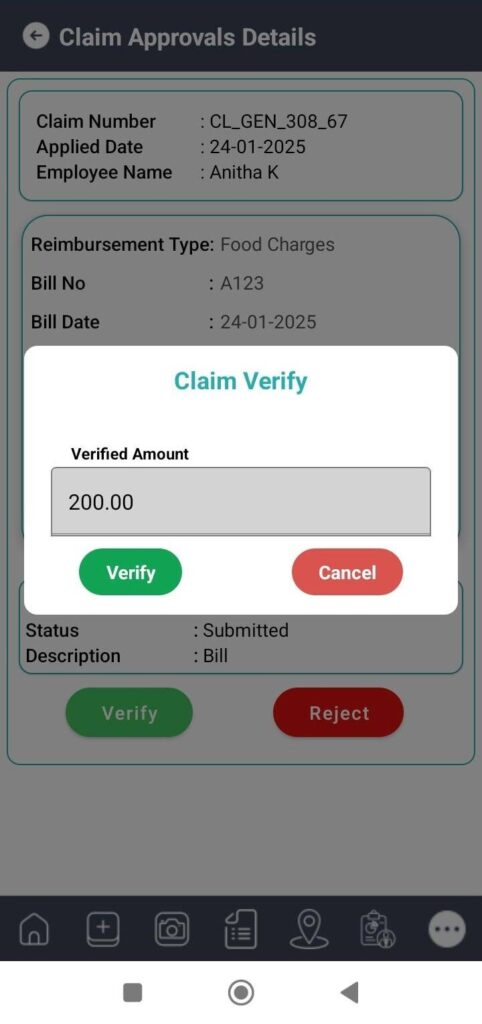
Click on claim request record – Claim Details are displayed with Verify and Reject buttons
Separate Reject button is displayed for each bill added in Claim Request
On click “Verify” button, “Verified Amount” is displayed with “Verify” and “Reject” buttons. Hyperlink to view the uploaded image files
Click on verify, claim is verified. Status is updated to “Verified” in Claims History in Employee Login
Verified records are shown in the web application for Finance Manager
Verified claims are approved by the Finance Manager from a web application
Approved records can be paid from Finance Manager Login in web application, later the status is updated to “Paid” for the Claim Request
All Claims Reports are available in “Claims Report” in web application in Claims Management module