Table Of Contents
- Managers Portal
- Payroll Management
Payroll Management
Payroll Management System
Finance Manager:
- User should login with finance manager credentials and click on Payroll module

Finance Dashboard:
- User can select Past months & Departments to check the employee's total salary, EPF, ESI & PF details.

EPF:
- Click on EPF in the side menu
- EPF configuration page is displayed with by default configuration
- Click on Edit button to update the EPF Configuration

- Admin can change all the configuration rules, based on organization rules. (Employee contribution and Employer's contribution & Admin charges, EDIL contribution)
- Click on save button to save the latest updates

ESI:
- Click on ESI in the side menu
- ESI configuration page is displayed by default configurations

- Here, User can check or uncheck the option” Include Employer’s contribution in the CTC”. Based on this selection, Employee's will get the ESI amount
- User can Add & Edit ESI Number State wise ESI number in this screen

Pay Schedule:
- Click on Pay Schedule page

- Pay schedule configuration page is displayed. Earlier configuration displayed by default
- Click on edit button to change the configuration

- All the configuration rules will display, now user can change the pay schedule rules as per organization rules

- If user wants Same payroll and leave window. Users should select the YES option
- If user selects YES option, Both Payroll window and Leave window are same
Example: Organization wants to pay the salary to employee's 1st to last day of the month Based on this selection, the application will calculate the salary

- If user wants different payroll and leave window. Admin should select No option
- If admin selects No option, Both Pay roll window and Leave window are different
- Admin can select the leave window dates
Example: Organization wants to pay the salary to employees 25th to next month 24th User should select the date Previous month 25 and present month 24 Based on this selection, the application calculates the salary

- If an organization wants to calculate monthly salary based on Actual days in a month
- User should select Actual days in a month option

- If an organization wants to calculate monthly salary based on Organization working days
- User should select Actual days in a month option
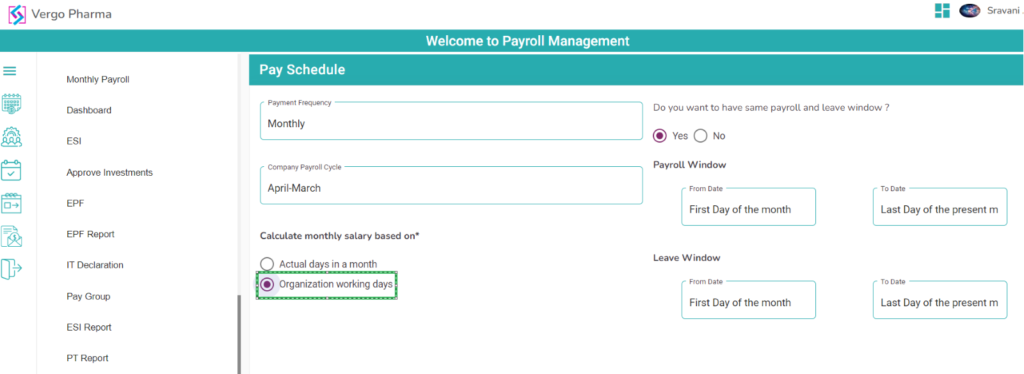
- On click Save to save the configurations

- Based on these configurations, Employees salary will generate
Pay group:
- In every organization, every employee has some range of salary with earnings and deductions
- So, User can configure the that range of salary, Earnings & deductions
- Click on the pay group page to configure the pay group

- Click on the add button to add a new pay group

- Add pay group page will display. Users can enter Pay group name, Start range & End range
- Select Earings and Deductions based on Organization rules

- Click on the save button to save the new pay group

- The new pay group will be displayed in the pay group table with configuration in progress status

Pay group configuration:
- Click on Configuration Button to configure the pay group
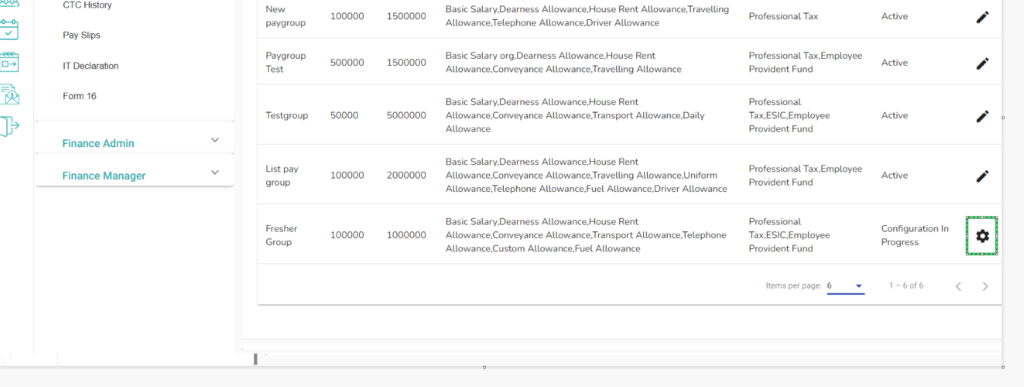
- All the selected Earnings and deduction components will be displayed

- Click on configure button to give percentage or flat amount to that component
- The Earning request page will display, here user can enter percentage or flat amount to the selected component
Note: Here users can check CTC percentage and Basic salary percentage. These percentages/flat amount will change automatically based on user inputs

- Click on the submit button to save the changes.
Note: Few components are not allowed to flat amount, so user should give percentage only to that type of components. Flat amount option will be in disabled mode.
Note: User can change the component name as they wish. It will reflect in Pay slip. Like this user should enter percentages or flat amounts to all the selected components.
- Then, pay group status is changed to “ACTIVE” from “Configuration in Progress”

Note: Active pay groups only display in assign group section. Otherwise, that pay group not displayed when user assigning to employee.
Assign Pay Group:
- Click on “Assign Pay Group” to add the pay group to employee

- Select Employee name, enter Employee CTC & Click on Search Button

- Based on Given the CTC, pay group information will be displayed. Now, User can select one pay group to that employee. After selection, CTC breakdown pop up will displayed with monthly and annual salary details. This calculation will change based on EPF configuration

- Click on the “Assign” button to save the data

- Employee salary will be calculated based on this pay group and components
Reassign Pay group:
- The Finance Manager can reassign new pay group for the new financial year and maybe at the increments time for the employees.

- There are two options with radio buttons to reassign pay group
- Change the employee CTC without changing the Pay group
- Change the employee CTC and Pay group
- If we select the 1st option, then select employee and enter the new CTC in the new CTC text field and click on submit button
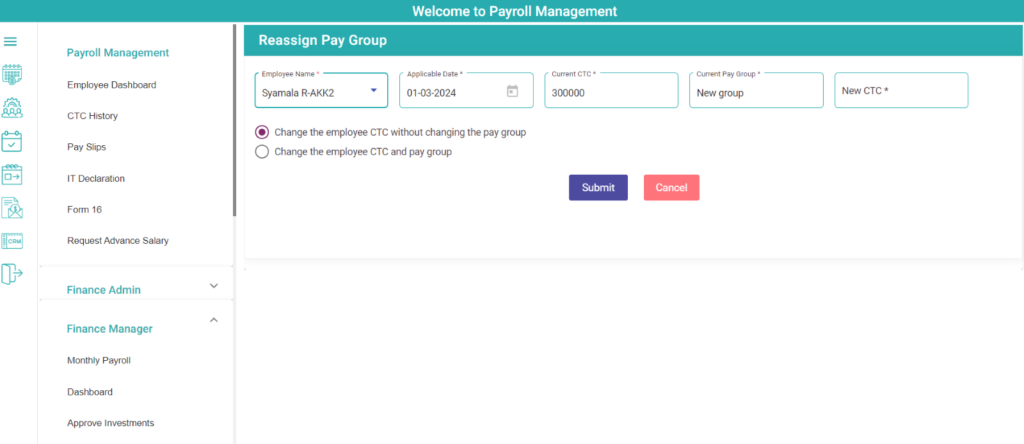
- Then employee is assigned with new CTC with the same previous pay group
- If we select the 2nd option, then need to enter new CTC in the text field and click on submit button
- Then created pay groups based on CTC are displayed in the list and select one of them accordingly

- Then New CTC with new pay group is assigned to the selected employee
Monthly Payroll (Generate Payroll):
- Click on the monthly payroll page to generate the pay slip to employees
- Only Finance Manager can generate payslip to the employees and employee can view pay slip in his/her login credentials in Payroll Management module
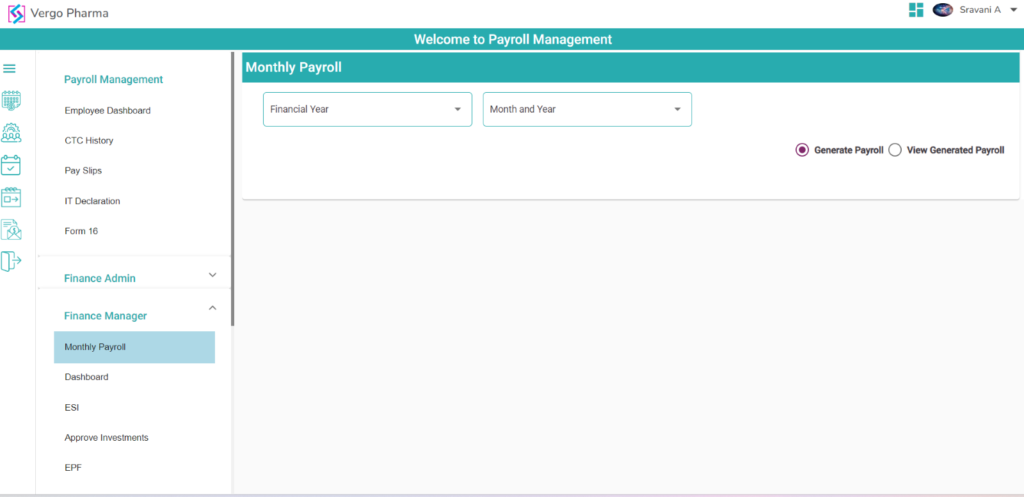
- Select Financial year and month and year. All the employee names will be displayed

- Select At least one employee or more and Click on Calculate Salary button to generate the salary slip
Note : Salary slips will be displayed in the employee dashboard in the employee login

Monthly Payroll Report (View generated Payroll):
- In this screen, User will get the all the payslip generated employee's salary details with bank account information. User can download the PDF to submit banks

EPF Report:
- In this screen, User can see the all the employee EPF Deductions. Users can upload this data to EPF portal by downloading this report

ESI Report:
- In this screen, User can see the all the employee ESI report. Users can download it in the form of PDF or Excel

Professional Tax Report:
- Login with Finance Manager credentials and click on Payroll Management module in the side menu
- In this screen, Users will know the count of employees by selecting state
- User should select the month and state, Click on Search button to get the employee information

Professional Tax (View):
- In this screen users will view the professional tax ranges and Monthly deduction amounts State wise. State names will be displayed based on locations added by admin

Payroll Messages Master:
- All Error and Success, Failure messages are available in the message master with screen names indicating which screens they are displayed on. (Will be displayed by default)

- User can Update those messages by clicking on Edit

- Users can edit error messages as they wish
- Click on save, message updated

Employee Payments Report:
- Click on Employee payments report, employee payments report page will display
- Employee payments report screen fields will display
- Select City-Branch, Manager & Month and Year fields
- Finance manager can select branch wise reports

- Click on search button data will be displayed in table for past months and current month with regularization
- Details will display with Grand Total in table

Leave Balance Report:
- Click on Leave balance report screen will display with data
- Employee available leave balance will display in table

Other Deductions:
- Click on other deductions, other deduction page will display
- In other deductions screen, click on add button fields will display
- Finance manager can give “deduction name and deduction amount” in fields
- Click on submit button
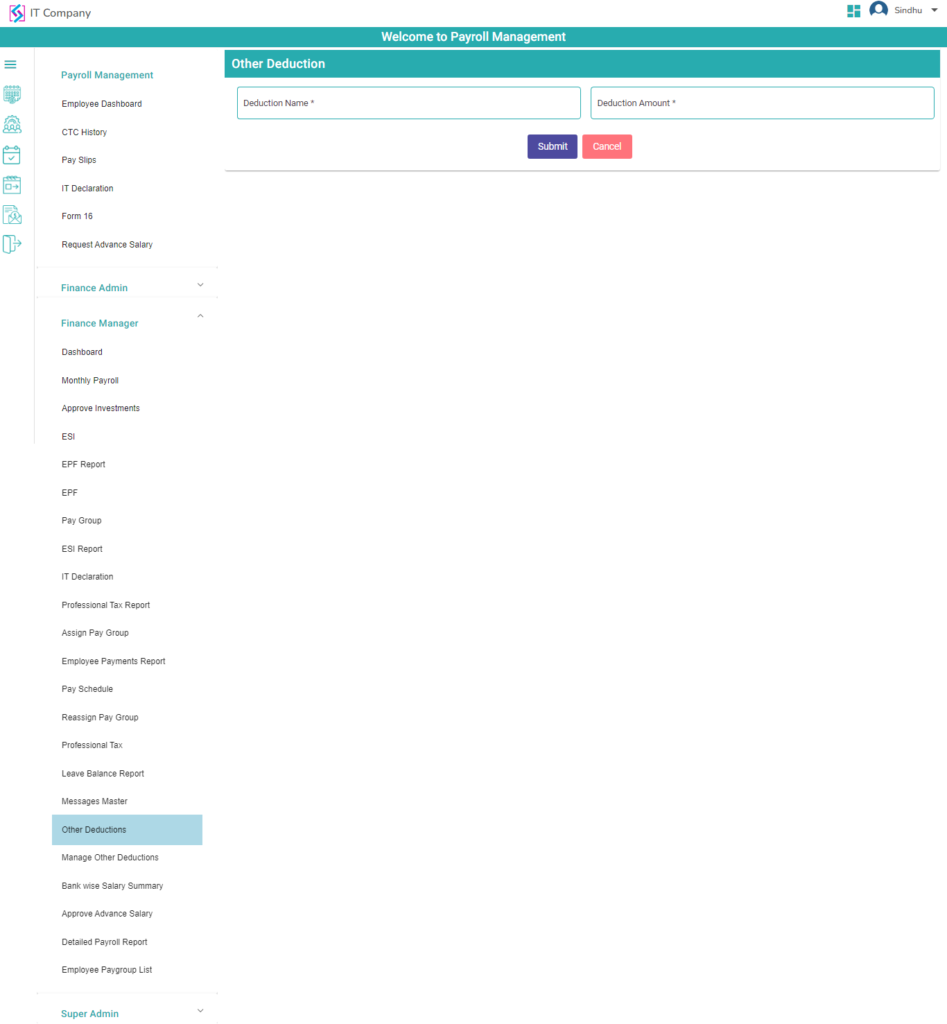
- Submitted data will display in table with edit icon

- On click edit icon, details are displayed in respective fields
- Finance manager can edit the deduction amount
- Click on save button, edited data will display in other deduction table

Manage Other Deductions:
- Click on manage other deductions, pay group deduction mapping screen will display

- On click add button fields will display
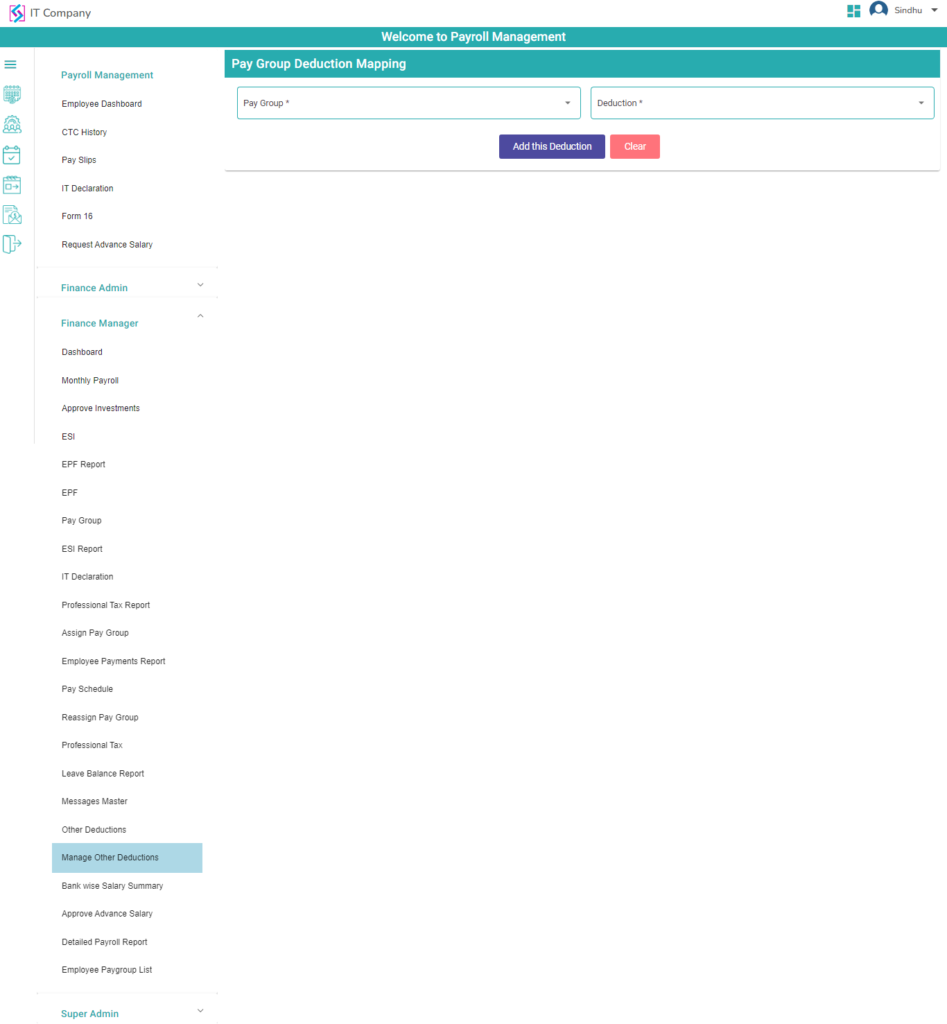
- Finance manager can select “Pay group dropdown and Deduction dropdown”
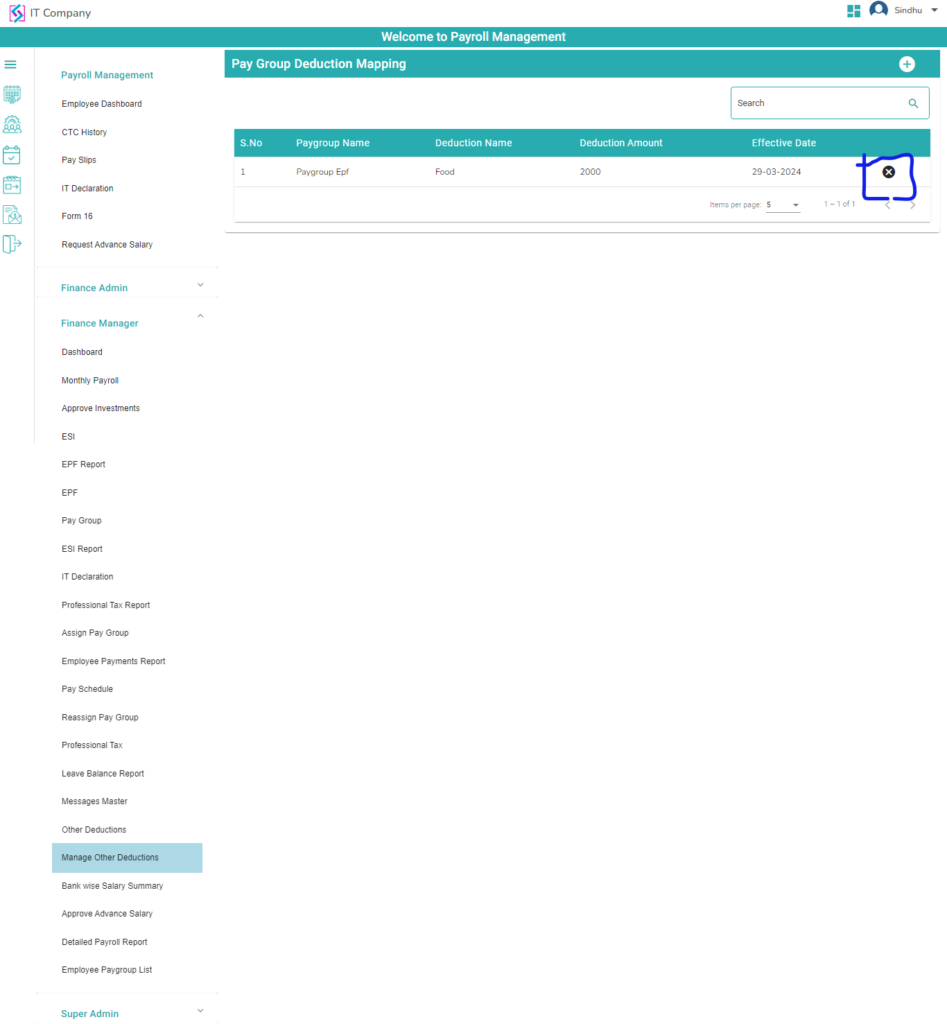
- On click “Add this Deduction” button and respective data will display in table
- On click Cancel icon record will be removed
Bank Wise Salary Summary:
- Click on bank wise salary summary, bank wise salary summary page will display

- On click add button, “month & year and bank name dropdown” fields will display
- Select Month & Year
- Select Bank Name dropdown
- On click search button

- Display ESI deduction amount, EPF deduction amount and PT amount for all employees
- Dispaly Pay group total employees' salary
- If employee salary is pending check box is disable
- Select checkboxes
- Total amount will display
- On click submit button

- Submitted data will display in table

- In bank wise salary summary screen, “Month and Year” field will display
- Select payroll generated Month and Year
- Data will display in table
Note : All Employees Total EPF, ESI, PT deduction amount will be displayed in table. No. of pay groups list will be displayed in Pay list.
- On click EPF pay group salary category “view” icon, all employees' lists will display in table
Note : EPF pay group, ESI pay group and ESI & EPF pay group (based on admin pay group creation)

EPF deduction:
- For all employees EPF deduction category
- On click EPF category view icon, EPF report will display
- Data will display in table

- On click close icon page will be closed
- On click PT category view icon, Employee list page will display

- Select State dropdown
- Employees data will display in table
- On click close icon page will be closed
Note : Only PT eligible employee's data will be displayed

ESI category:
- On click ESI category view icon, employee list will display
- Select State dropdown
- ESI report will display
Note : only ESI eligible employees salary details will display

Detailed Payroll Report:
- Click on detailed payroll report, detailed payroll report page will display
- Previous month data should display by default
- Select Month and Year
- Click on search, data will display in table

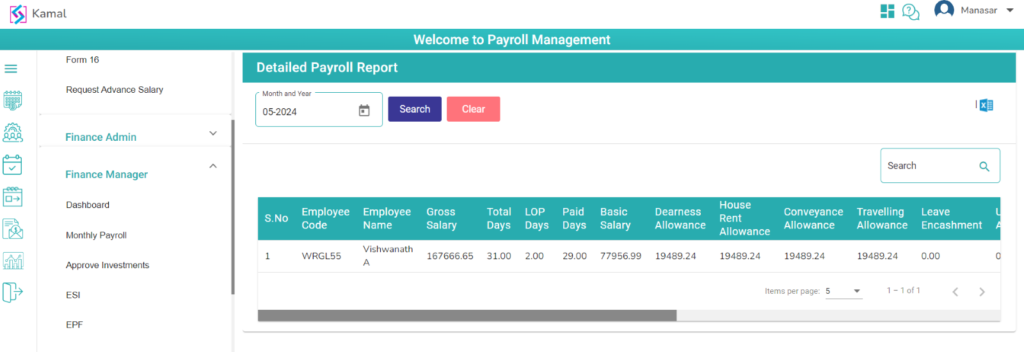
- Click on view icon pay slip screen will display
- Users can download the pay slip.
Employee Pay group List:
- Click on employee pay group list, employee pay groups screen will display
- Display Employee Name, Location and Pay groups fields will display
- Select Location dropdown and pay groups dropdown

- Particular Location and pay group assigned employees data will in table

- User will search with employee name and particular employee data will display

Advance Salary Report:

Payable Days Report:

- Here the user can select month
- Select Branch Location
- Select Manager and then click on search data will display in table

- Here user can select employee in search field

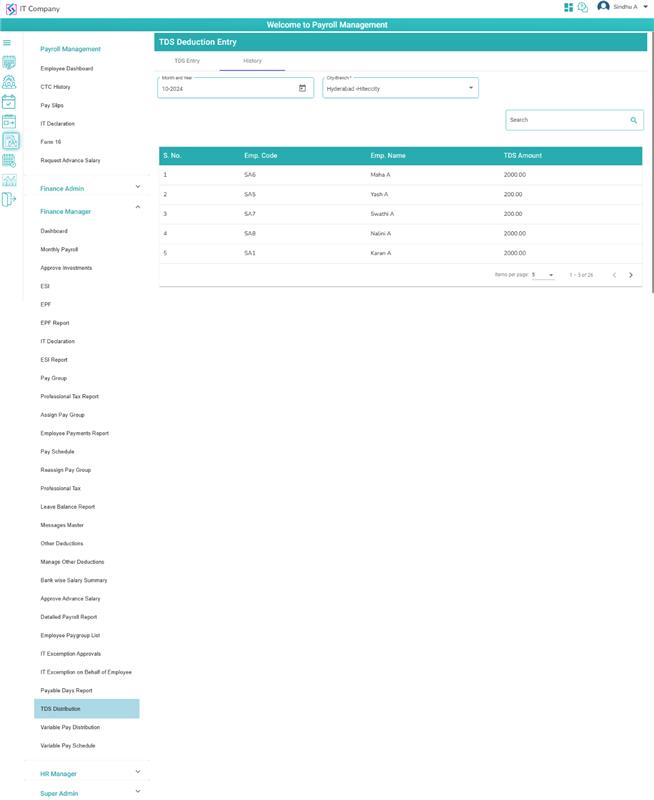
TDS Distribution:
- Click on TDS Distribution

- User click on TDS Entry
- Select Month & City-Branch
- Employees names will display in table
- User able to search with employee name in search field
- Select checkbox and enter amount
- Click on submit
- Data will save in TDS History
- Click on TDS History
Variable Pay Distribution:
- Click on variable pay distribution
- Click on Variable pay entry


- Select City-Branch
- Select Calculation Period
- Select Distribution period
- Display Employee names
- User able to select employee names in search field
- User select check box and variable pay amount
- Click on submit
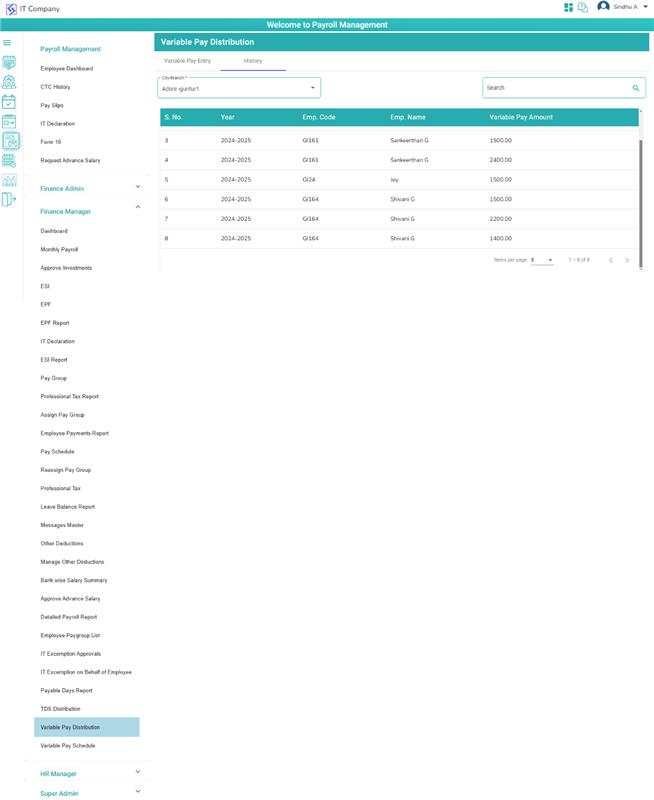
- Click on history
- Select City-Branch
- Employees data will display in table
Variable Pay Schedule:
- On click variable pay schedule

- User will be able to select distribution type Monthly share or Lump sum
