- Employee Portal
- Attendance Management
Attendance Management System
Login:
- Enter Company code, Username/Email and Password and click on Login.

- After successful login, main dashboard is displayed. (Employee Card, Company announcements and Alerts) are displayed

- Click on Attendance Module in the side menu

Employee Dashboard:
Calendar:
- Employee Attendance, Holidays, Week Off’s, Leaves are displayed in calendar

Check In/Out:
- Employees First In and Last Out time is displayed
Shifts:
- Assigned Current shift, Next shifts are displayed with date and time.
Requesting Attendance:
- Employee can mark their attendance request in following 3 ways:
From Main Dashboard:
- Employee will see the Pending attendance requests in Alerts section

- Employee can submit attendance request or Leave request to pending days

- It navigates to Attendance request page, when Employee clicked on attendance request icon
Dashboard:
- Employee can see ‘Send a request’ option under ‘’Pending Attendance” section on their dashboard
Send a request:
- Click on “Send a request”, Attendance Request page is displayed.


- User can apply request for the particular date
- Select Work type from dropdown
- From date, by default pending date is displayed and disabled
- To date, by default pending date is displayed and disabled
- Enter Reason
- Select Attachment (if any)
- On click “Submit”, attendance request is submitted
Attendance Request:
- Click on Attendance Request in the Attendance Module. Attendance Request page is displayed

- Select option from Work type dropdown
- Available work types are Work From Home, Work From Office, On-Duty, Work From Remote Location in the drop down
- User can select any work type from the list
- Select From date
- Select To date
- Enter Reason
- On click First Half check box attendance will be considered for First Half
- On click Second Half check box attendance will be considered for Second half
- Upload attachment
- On click “Submit”, attendance request is submitted
Note: Applied record status is displayed as “Submitted” until manager approves it. After manager approves the attendance request then status is changed to “Approved” or “Rejected” if manager rejects it

- Before approval or rejection of the attendance request, employee can edit or delete it

Edit Request:
- On click edit of an attendance request, details are displayed in respective fields
- Employee can update work type and from date, to date, reason & attachment (if any)

- On click “Update”, attendance request is updated
Delete Request:
- On click Delete icon, attendance request is deleted after confirming as yes

Note: On click “Yes” selected record status is changed to Deleted. On click “No” selected record status is same as before
View:
- After completion of manager approval or rejection of attendance request employee can see the details with View icon

- On click View, Employee can see the data
Monthly Detail Report:
- Login with employee credentials and click on Attendance Management in the side menu
- Employees can check their Monthly Detail Report in Attendance Management module
- Employees can also download their attendance Detail Report, by clicking on Excel & Pdf icons

Shift Change Request:
- Click on add button to send a shift change request to Reporting manager
Note: Employee must have shift assigned to him/her for applying the shift change request

- Applied date is displayed by default and disabled
- Select from date and to date
- Shift name is displayed based on the Selected dates in from shift text field
- Select “To Shift”
- Enter Reason
- Click on submit button

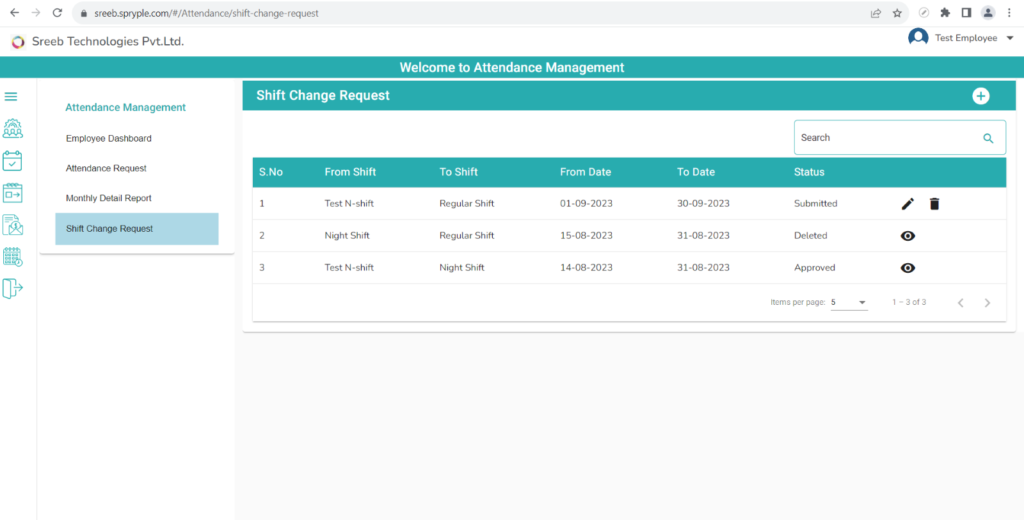
Note: Applied attendance request record status is “Submitted” until manager approves/rejects it. After manager approved it, then status is changed to “Approved”
Employee can Edit the existing record and delete the record by using Edit icon & Delete icons
Employee can view the Approved, Rejected, Deleted attendance records by clicking on View Icon
Request Permission:
- Click on add new button to request permission for present day/future days

- Select a date
- Enter permission duration in minutes
- Enter Reason
- Click on submit
- Employee cannot apply for multiple permission requests for any days

- Applied permissions request record status is “Submitted” until manager approves/rejects it. After manager approved it, then status is changed to “Approved”.
- If manager rejects it, then status is changed to “Rejected”.
- Employee can Edit the existing record and delete the record by using Edit icon & Delete icons
- Employee can view the Approved, Rejected, Deleted permissions request records and employee can cancel approved record by clicking on cancel icon.
Attendance Regularization:
Note: If Employee check in but not check Out then that record is displaying in attendance regularization table.
- Click on add new button to request permission for present day/future days

- Employee can edit out time by clicking on edit icon

- Enter out time
- Save the out-time record by clicking on save icon
- After saving that record will get removed from the table
- Cancel the out-time record by clicking on cancel icon
- Employee can apply leave by clicking on leave request icon
- After clicking on lave request icon
- Select leave types
Note: If employee has leave types that regular leaves will display in dropdown, if employee does not have regular type of leaves in dropdown only Loss of Pay will display.
- Select leave type
- From date will display by default
- To date will display by default
- Based on From date and To date Leave count will display by default.
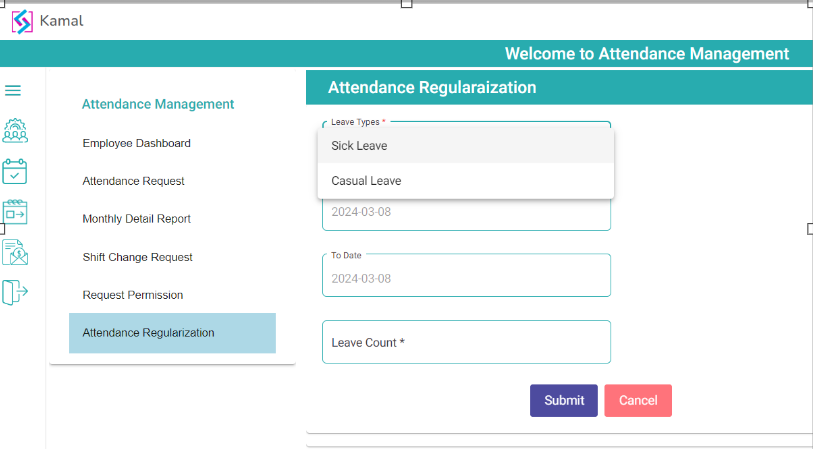
- Click on submit

- After submit leave will be applied and that record will removed in attendance regularization
Attendance Summary Report:
- Manager can see the employee's summary report. Click on summary report
- Manager should select the period of date based on requirement

- Click on Details

Late Attendance Report:
- Employee can see their late attendance report
- Select from date
- Select To date
- Click on search button to get the late attendance data

- Click on clear, data will refresh and back to current month
- Employee can download his/her late attendance information, by clicking on Excel & Pdf icons
Missed Punch Report:
- Employee can see them missed punch out records
- Select month
- Click on search button to get the missed punch out records

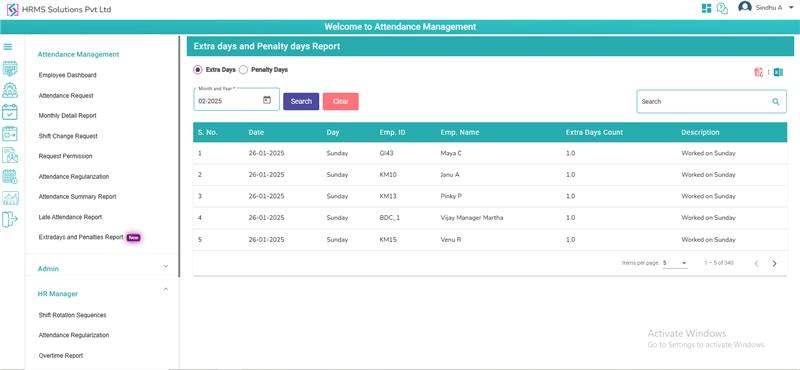
Extra Days:
- Click on extradays radio button
- Extra days page will display
- User can select the month then click on search button
- Based on pay schedule window extra days will display in table

- All location employees’ data will be display in table
- User can be able to download PDF and Excel
- User can search with Emp ID and Emp Name
- Here weekoff present days, Holiday present days and slab count will display in table
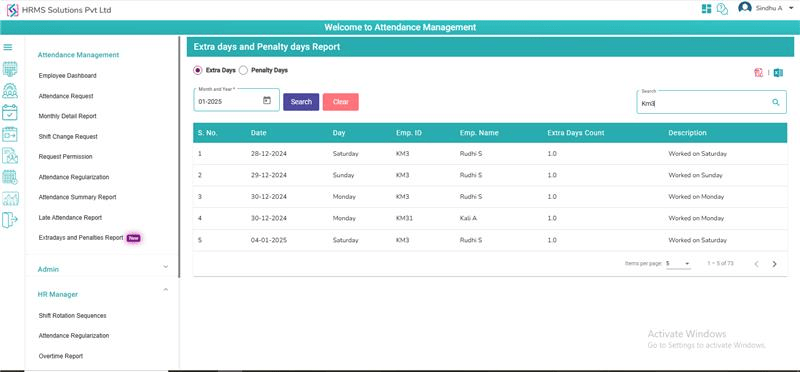
- Click on Clear button selected month data will be cleared, and current month data will display in table
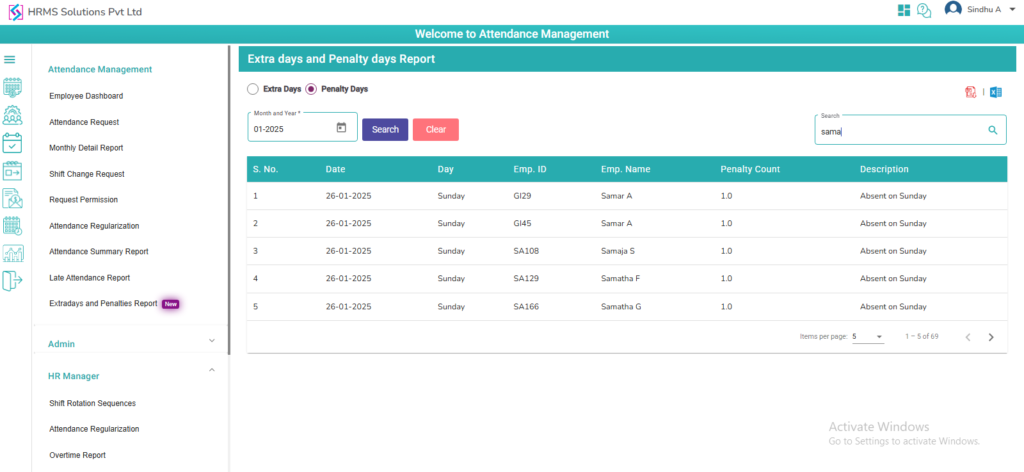
Penalty Days:
- Click on Penalty days radio button
- Penalty days page will display
- User can select the month then click on search button
- Based on pay schedule window penalty days will display in table
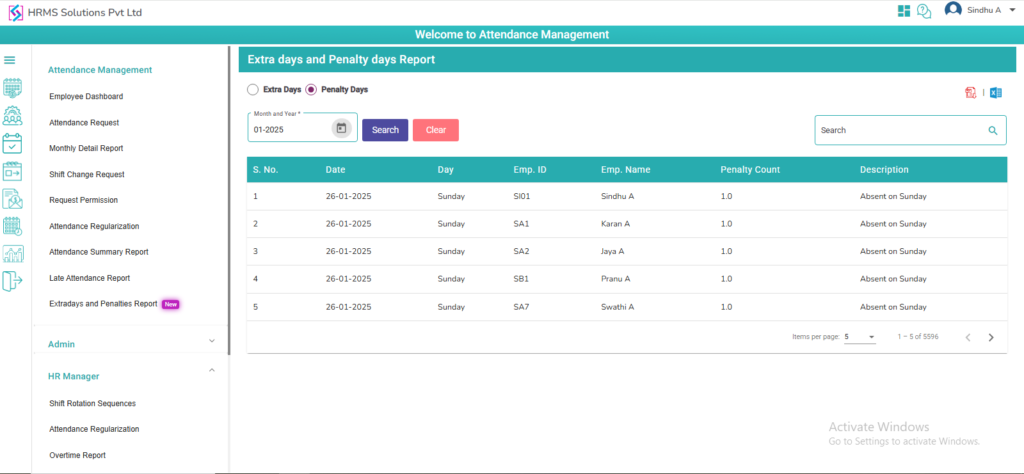
- All location employees’ data will be display in table
- User can be able to download PDF and Excel
- User can search with Emp ID and Emp Name
- Here late attendance and week off absent deduction penalty days will display in table
